本文同步发表在小专栏 WWDC19 内参
WWDC 2019 Session 706: Introducing Sign In with Apple
引言
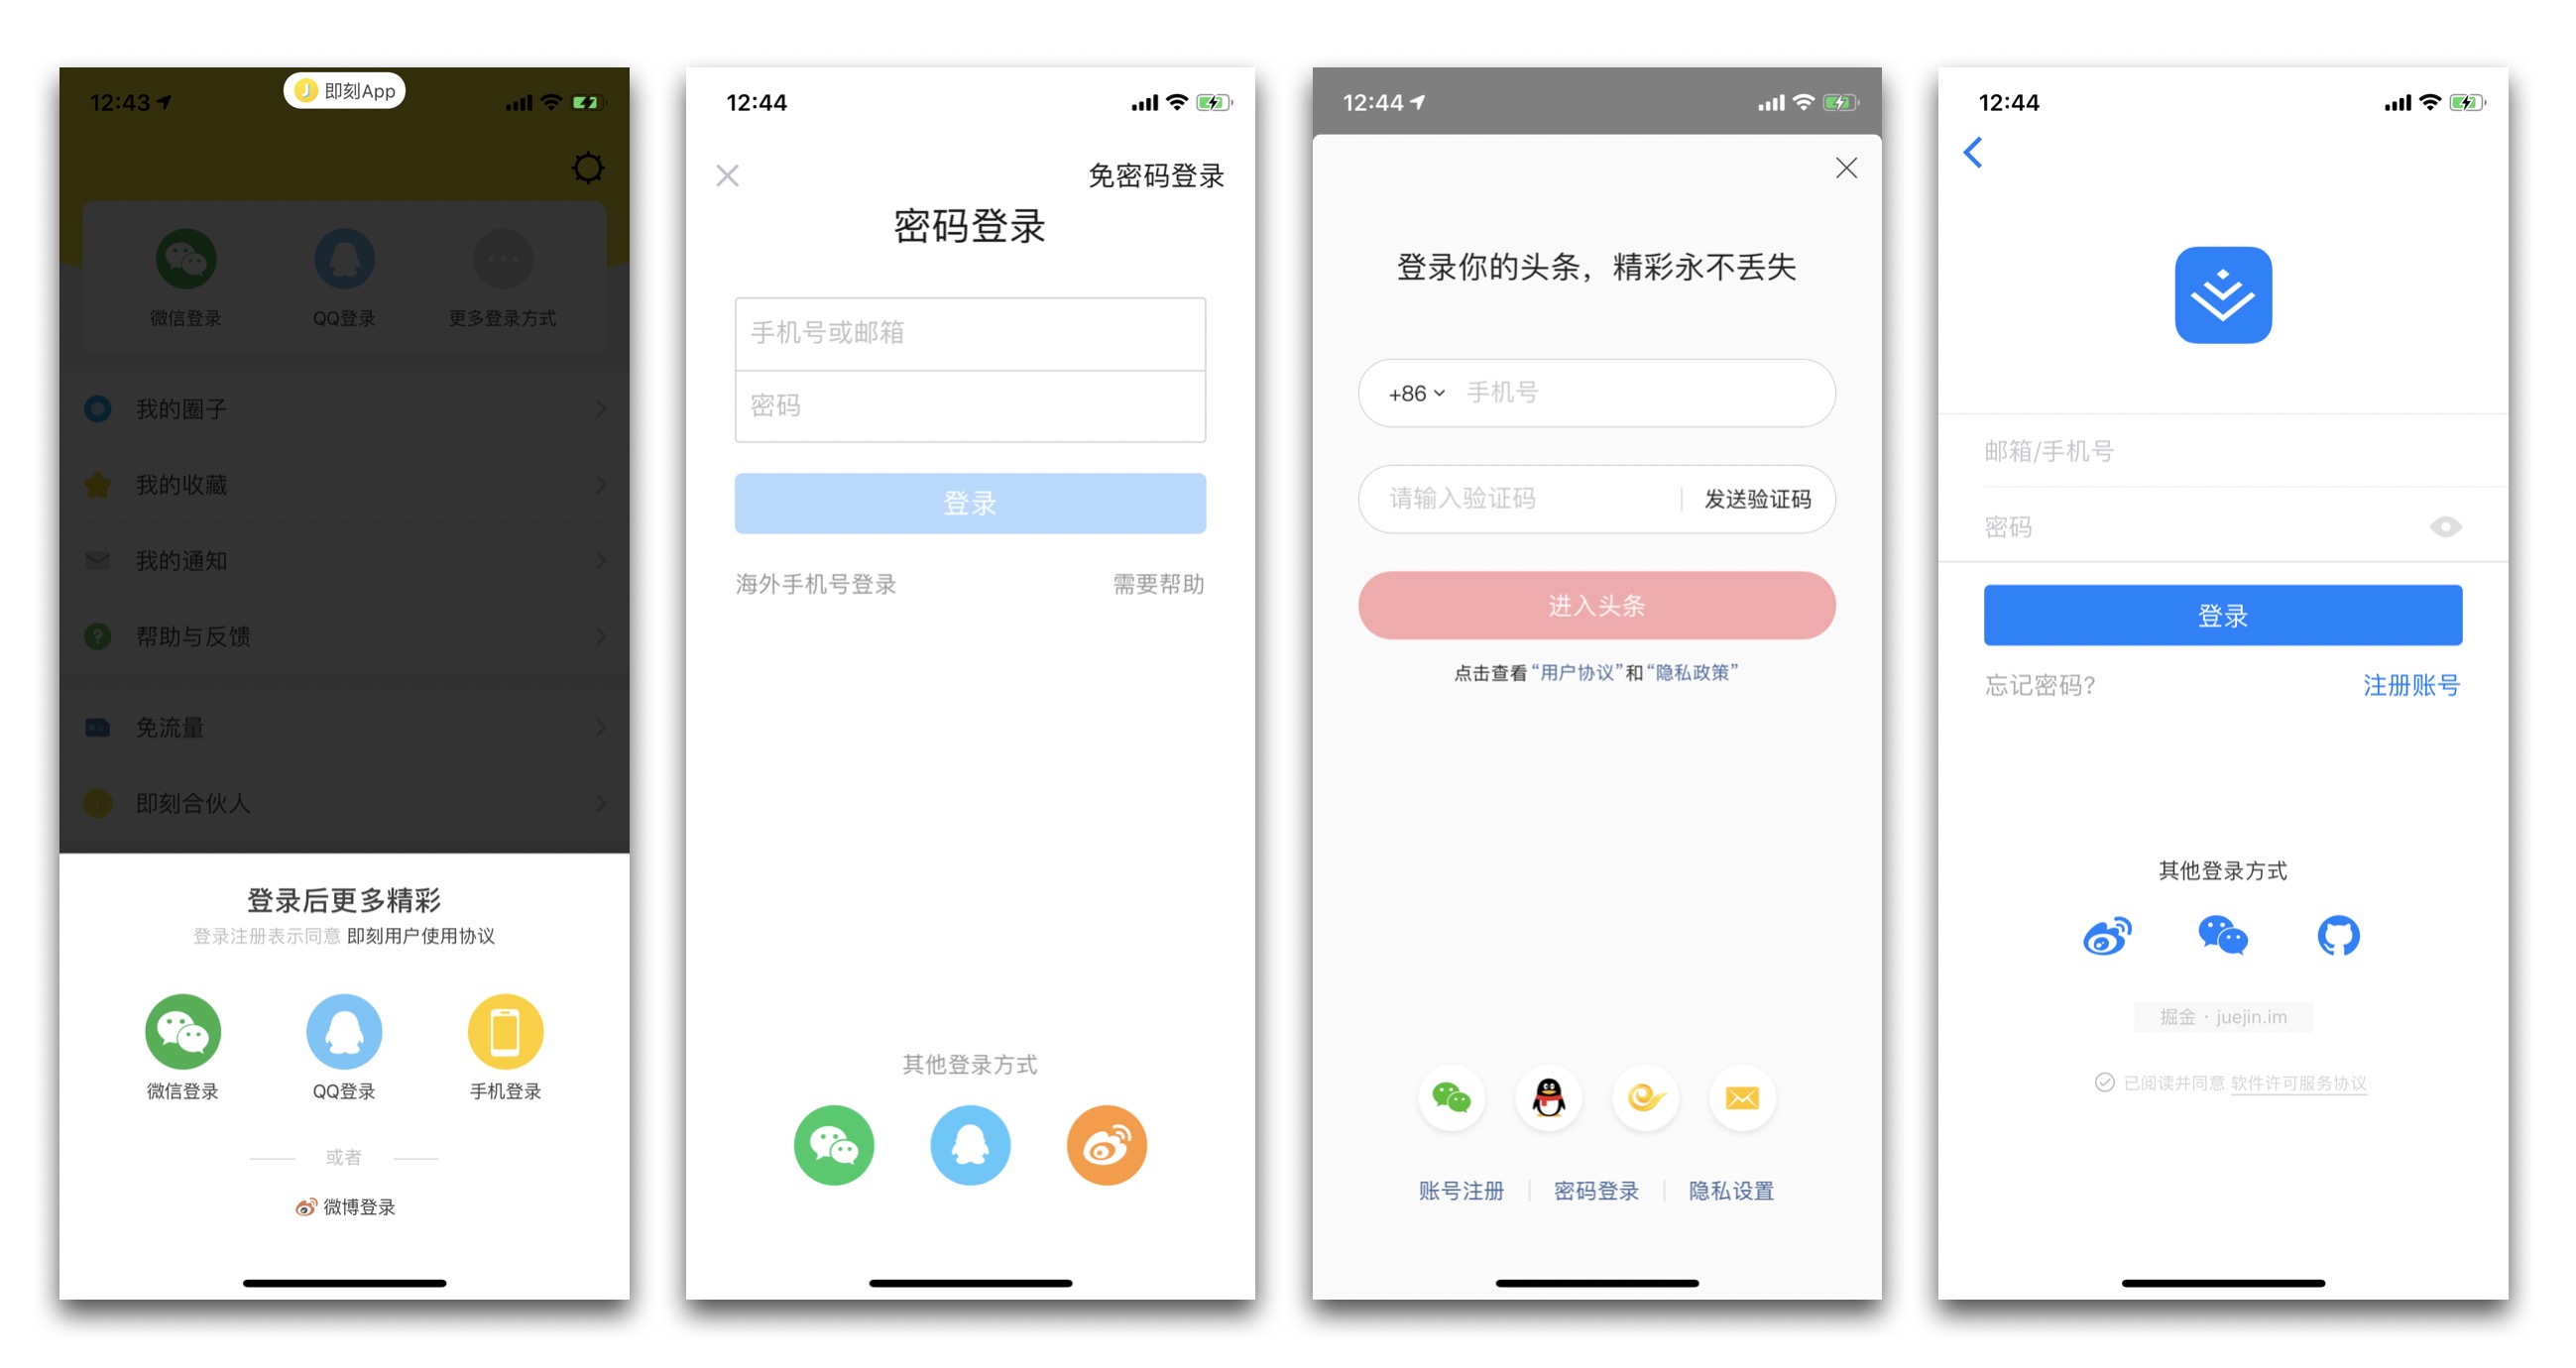
对于绝大部分应用,通常都会有自己的账号体系,但为了避免用户经常忘记账号密码,那些中小型 App 一般都会接入来自大厂的第三方登录 SDK,如在国外常见的有使用 Google、Facebook、Twitter、GitHub 等账号登录;而在国内,近两年几乎所有的 App 都会推荐首先使用手机号+短信验证码的方式注册/登录,同时也会接入像微信、QQ、微博、支付宝等超级 App 的登录 SDK,便于用户实现一键登录,如下图:
在 WWDC 2019 上,苹果也想在第三方登录服务这块“蛋糕”上分一杯羹,给我们带来了 “Sign In with Apple”(使用苹果账号登录)。这似乎也是水到渠成的事,因为几乎所有的 iOS/macOS 设备都会登录 Apple ID,而且近两年来,苹果强制对所有的 Apple ID 推行 Two-Factor Authentication(2FA,双重因子验证),大大提高了苹果账号的安全性,减少了盗号风险。
因此,我们可以畅想在不久的将来,在苹果设备上,只要登录了 Apple ID,就可以直接登录所有的 App,是不是很方便?但这同时也是黑客们的福音啊…👻
概览
The fast, easy way to sign in to apps and websites.
通过 Sign In with Apple,用户可以轻松登录开发者的应用和网站,开发者可以获取到以下三个信息用于创建自己的账号体系(下一节会细讲):
- ID
- Full name
- Verified email address
它具有如下几个特性,详见这里:
- 简化账号的创建和登录流程,无缝跨设备使用;
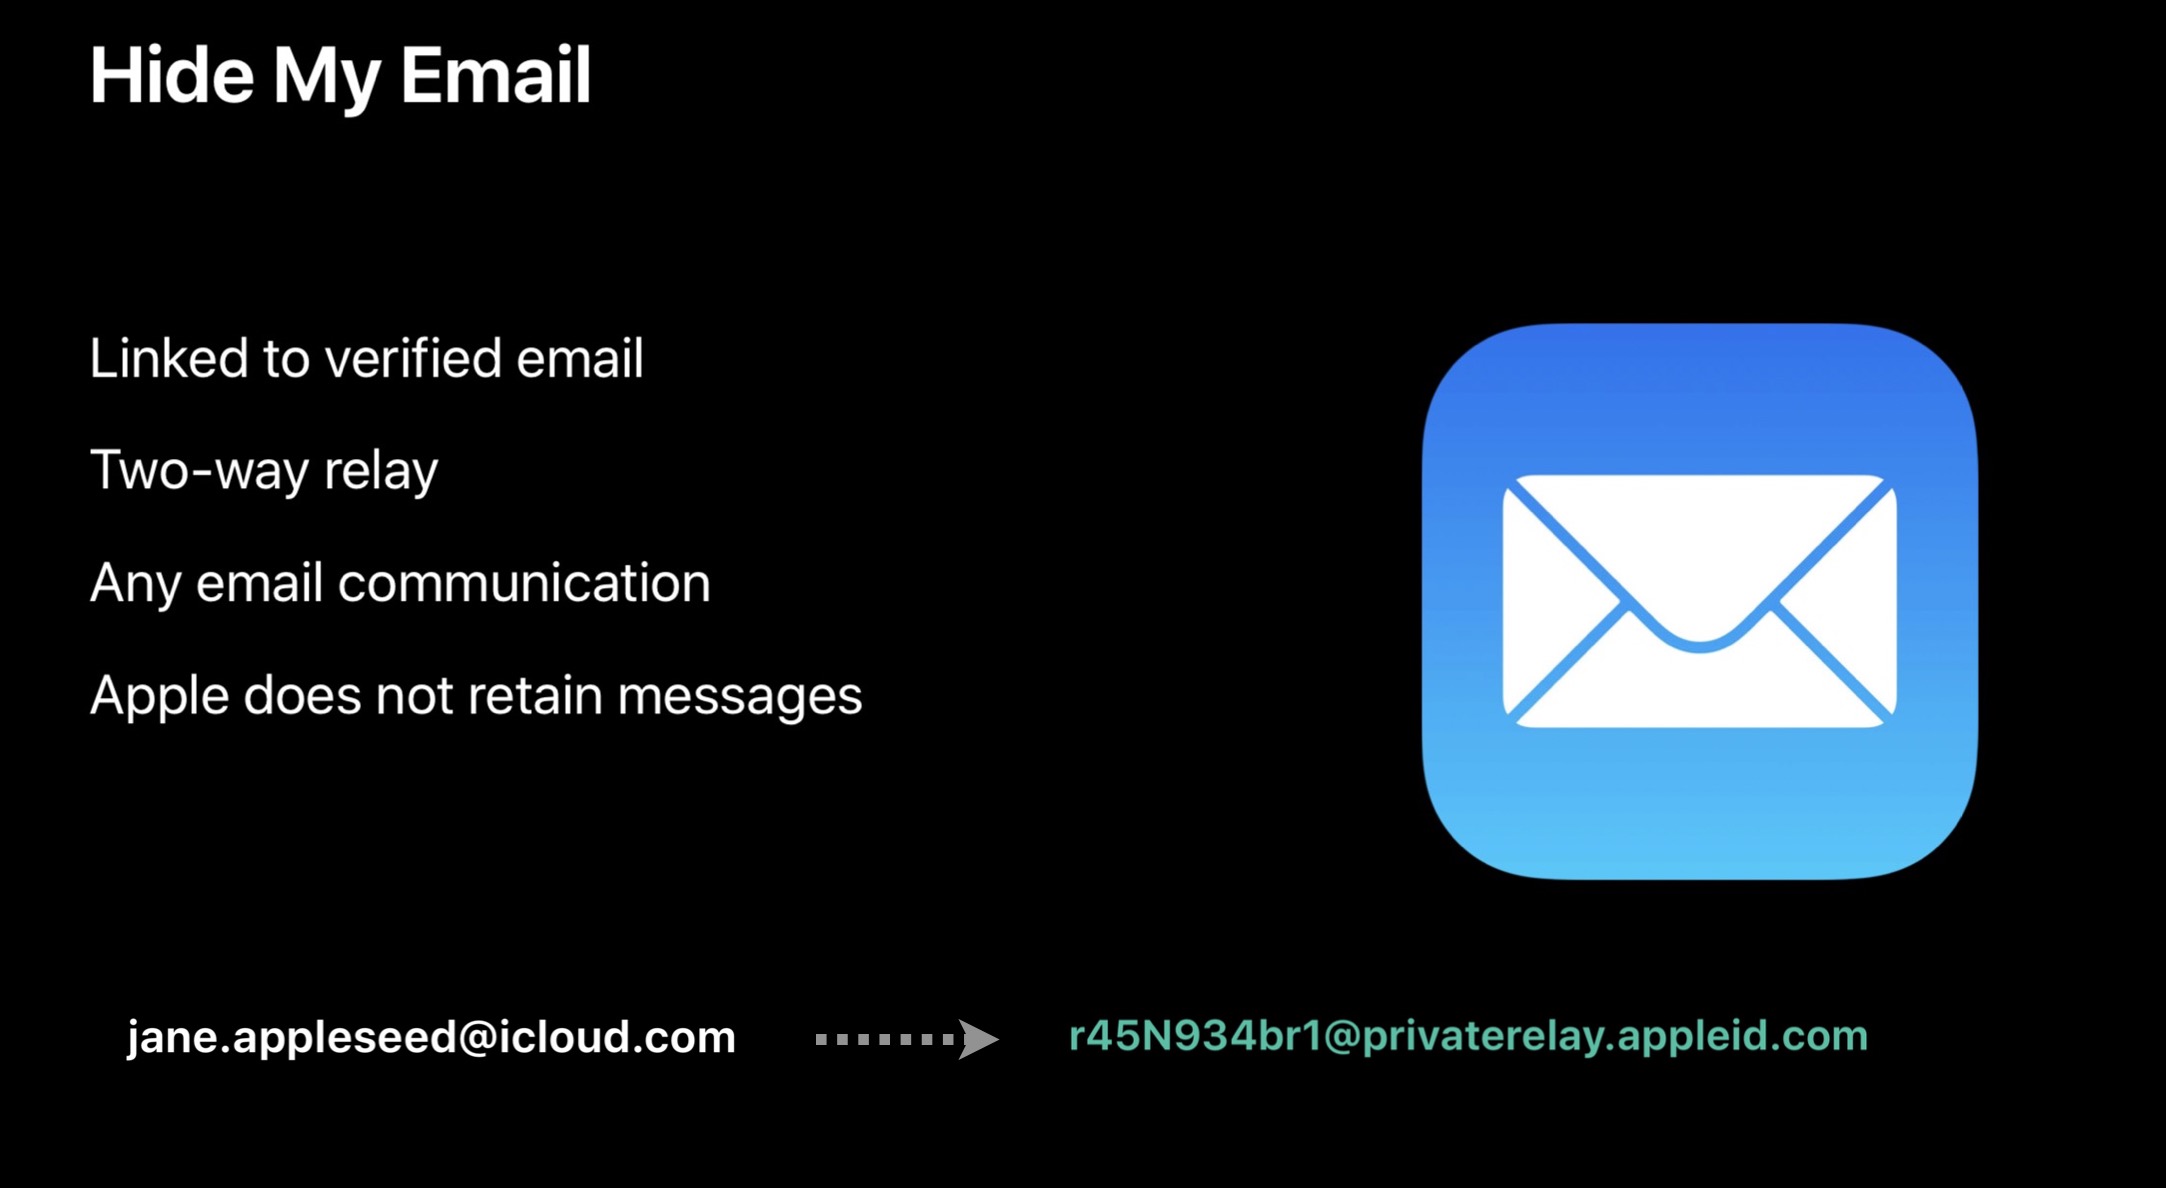
- 开发者可以获取到已验证过的邮箱作为登录账号或者与用户进行通信(注:用户可以选择隐藏真实邮箱,并使用苹果提供的虚拟邮箱进行授权);
- 系统内置的安全性:2FA 双重验证(Face ID 或 Touch ID),从此登录不再需要密码;
- 尊重用户隐私:开发者仅仅可获取到用户的姓名和邮箱,同时苹果不会收集任何用户与应用之间使用数据;
- 反欺诈:使用设备上的机器学习等技术和其他信息,帮助开发者判断一个账号是否为真实用户;
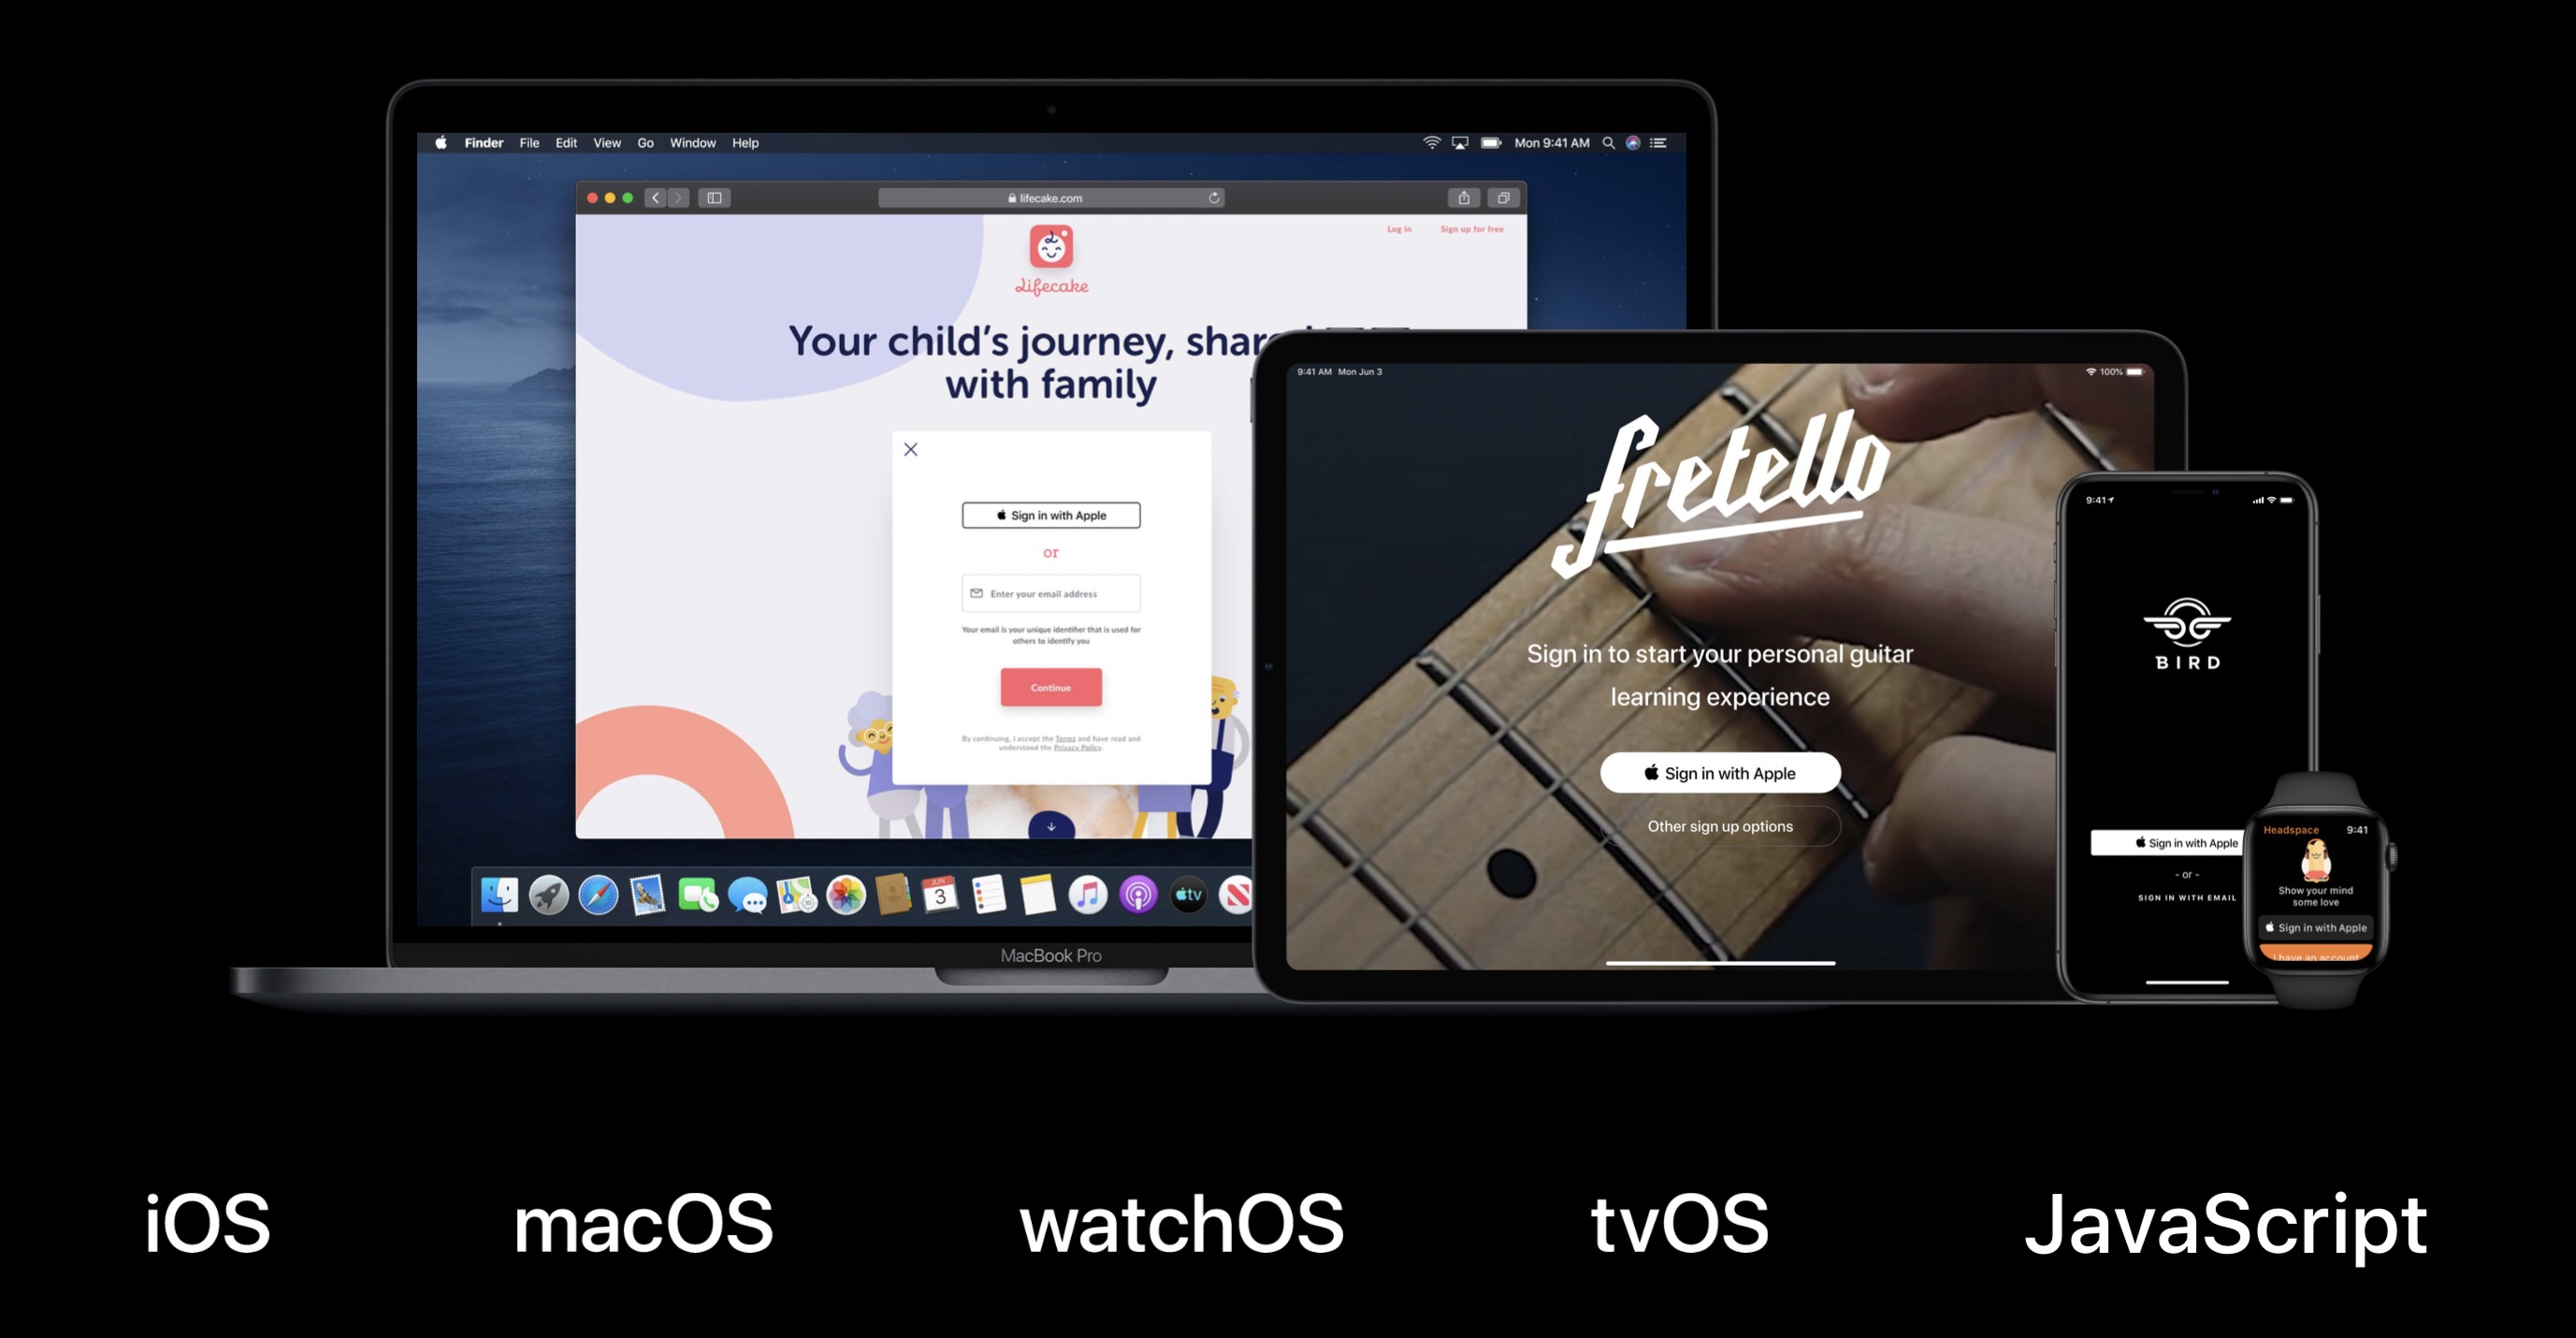
最重要的是,它是跨平台的!!!
如何集成
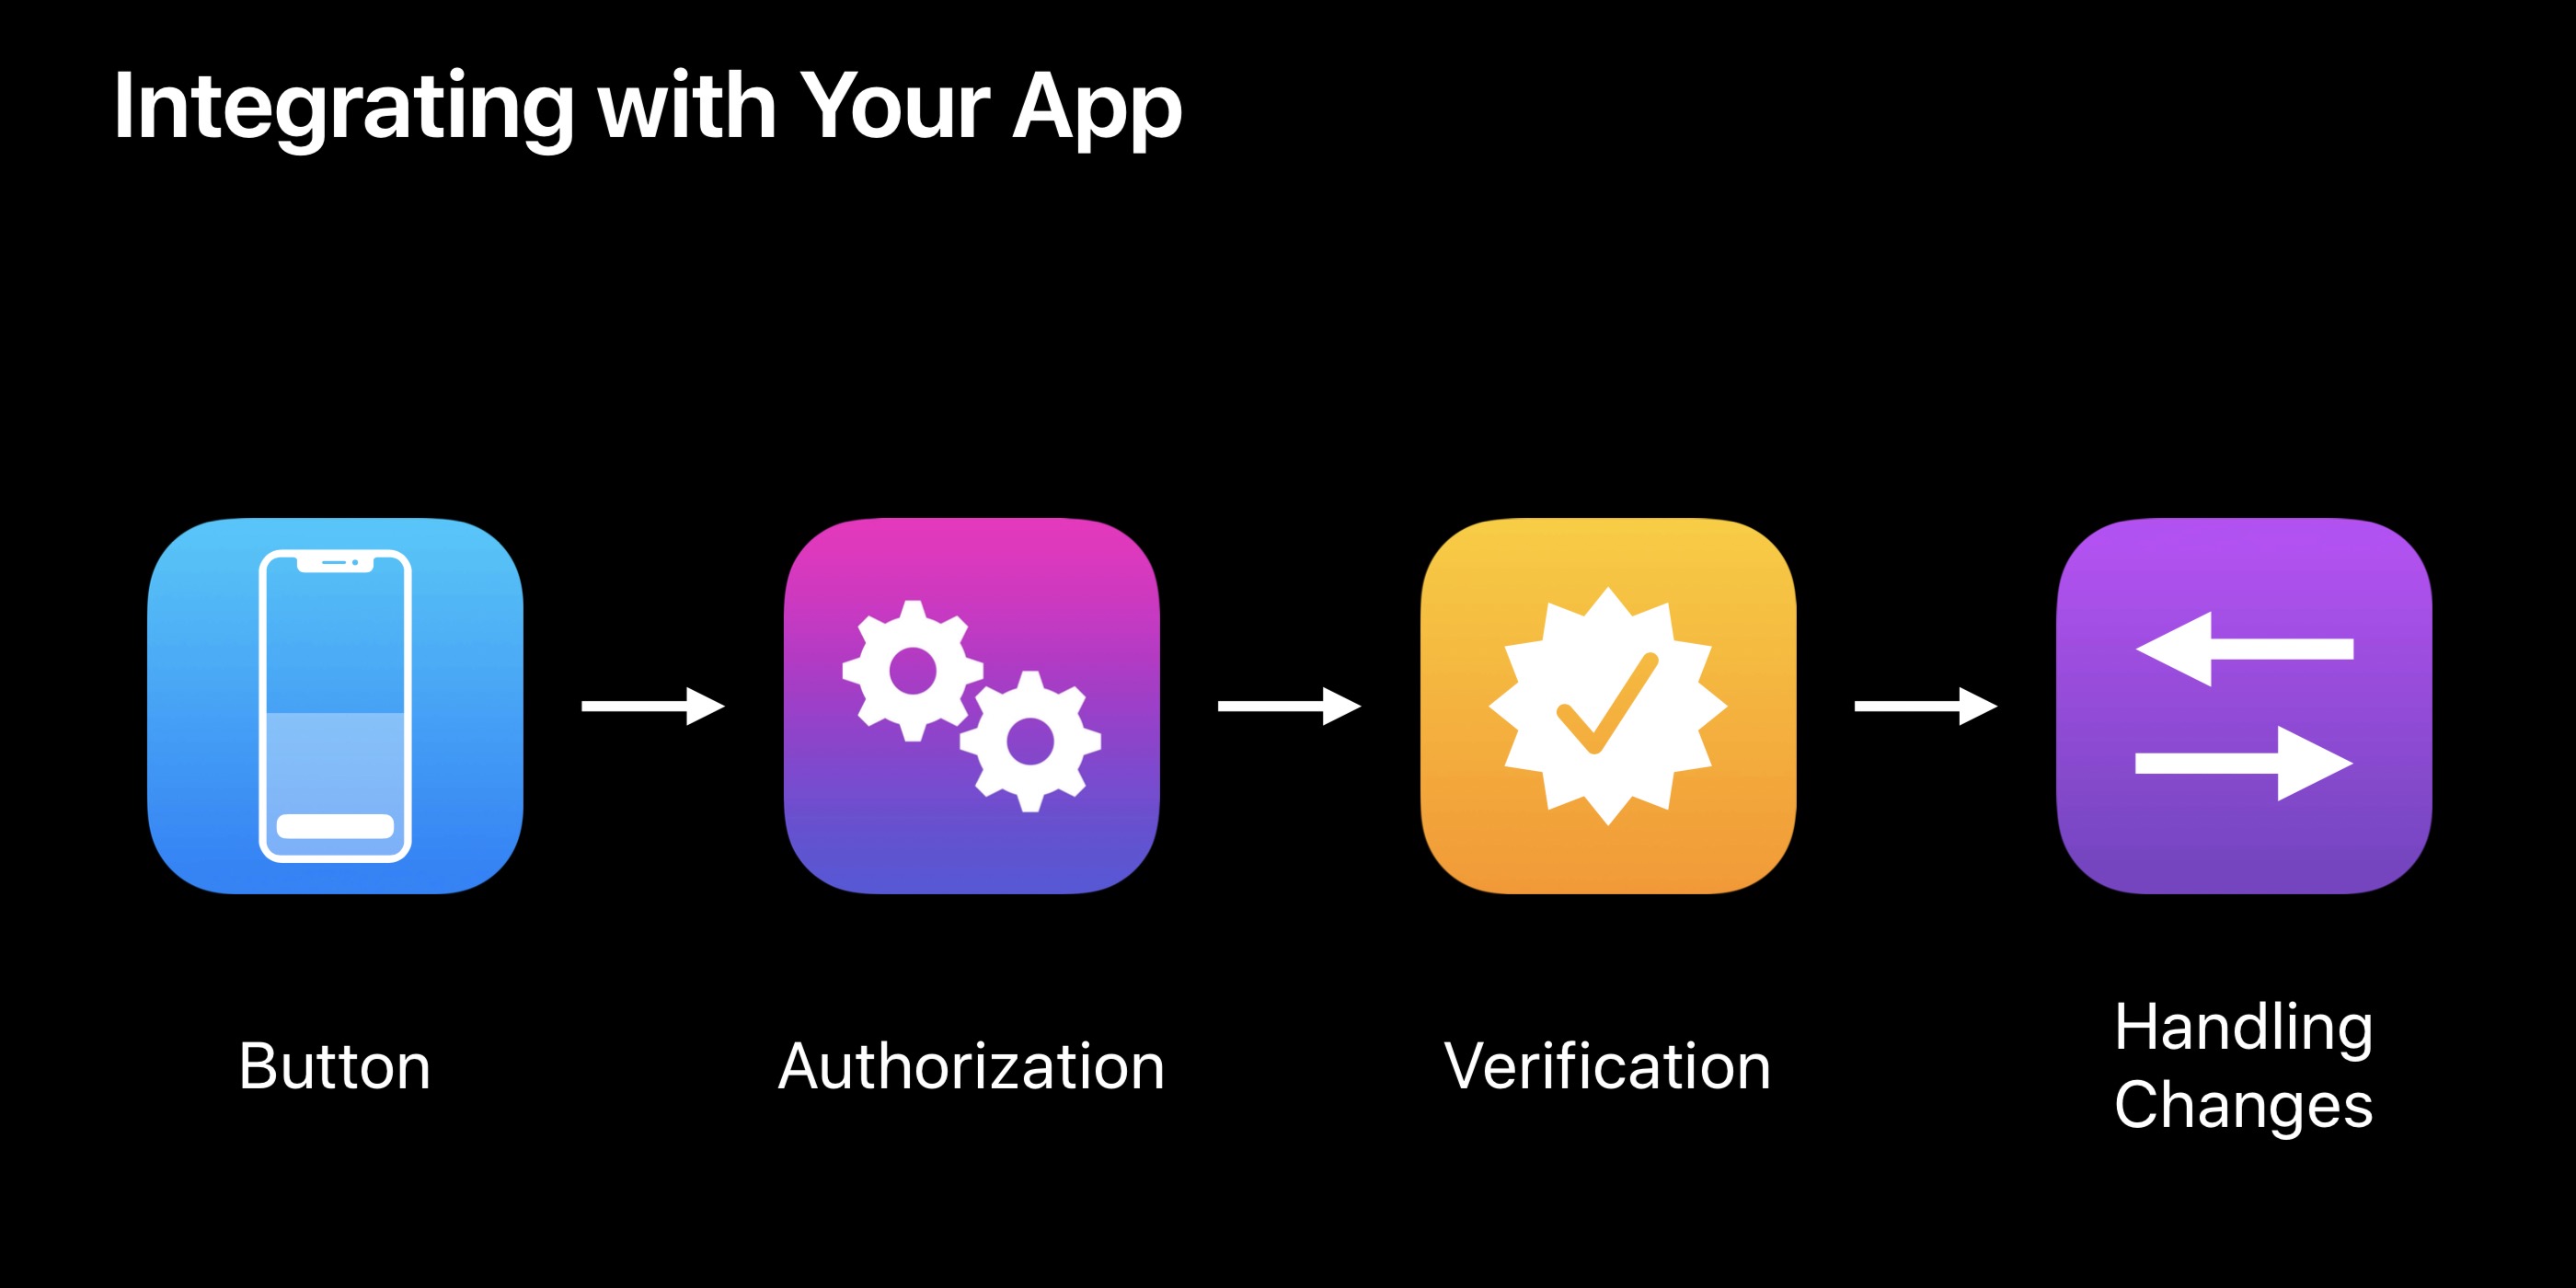
在你的 App 中集成 “Sign In with Apple” 服务,大致只需要以下 4 步骤:
添加登录按钮
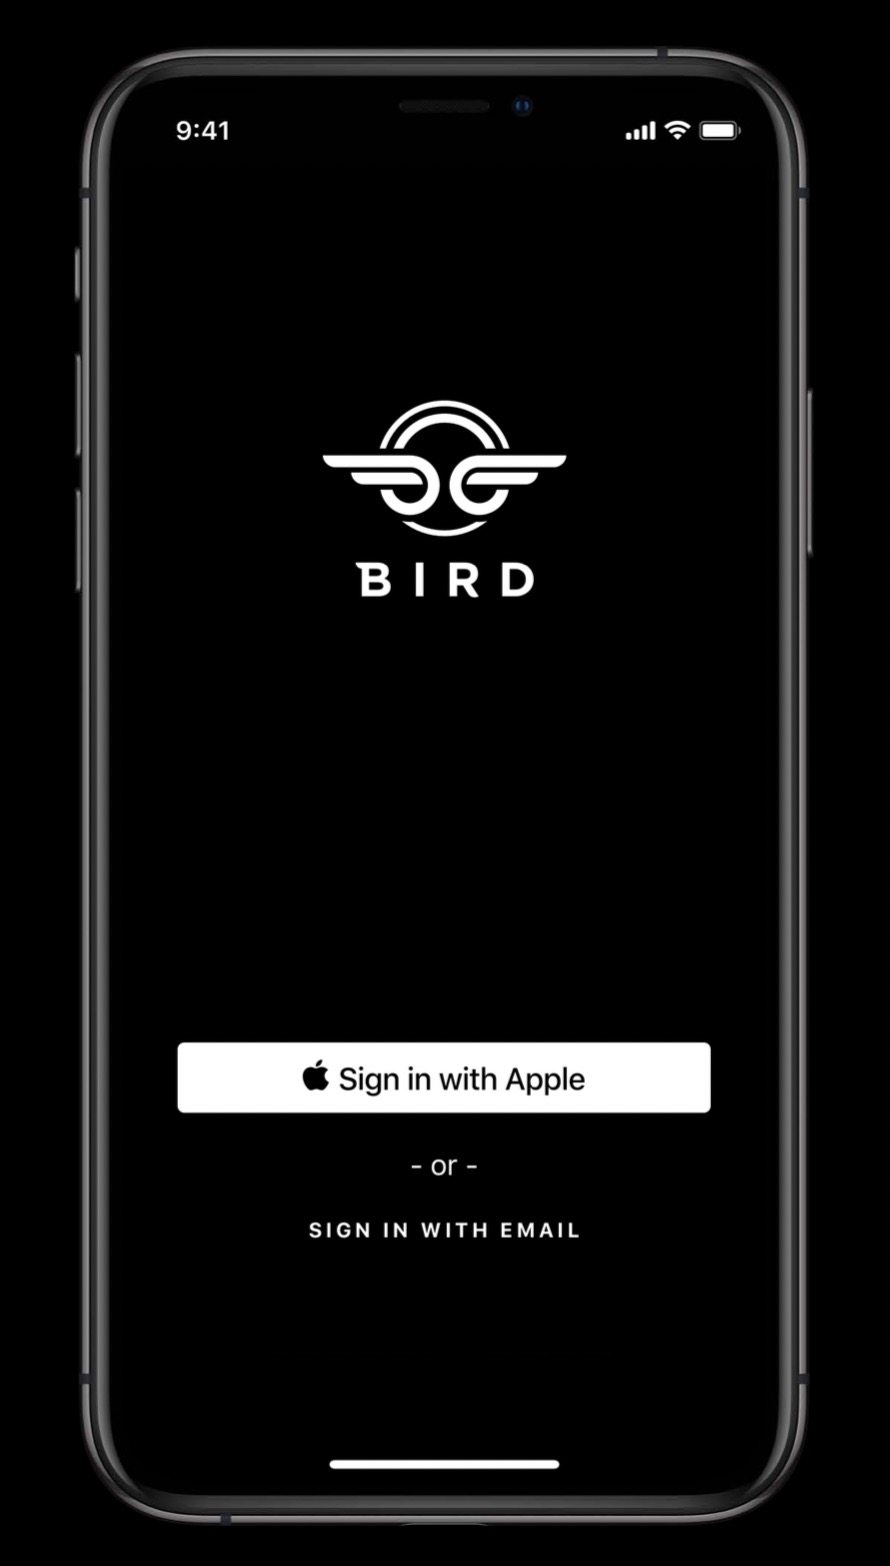
首先,在你 App 的登录页面添加一个 “Sign In with Apple” 按钮 ASAuthorizationAppleIDButton,并添加按钮点击响应事件,代码大致如下:
1 | // Add “Sign In with Apple” button to your login view |
当然你也可以自定义苹果登录按钮的样式,样式要求详见这个文档:Human Interface Guidelines
最终的登录页面效果图参考如下:
发起授权请求
在上述按钮点击事件 handleAuthorizationAppleIDButtonPress 中配置需要获取的数据权限范围(例如:用户名、邮箱等),然后设置回调代理,并发起登录授权请求,代码如下:
1 | // Configure request, setup delegates and perform authorization request |
当用户点击 “Sign In with Apple” 按钮后,就会显示苹果登录授权确认页面,如下图所示:
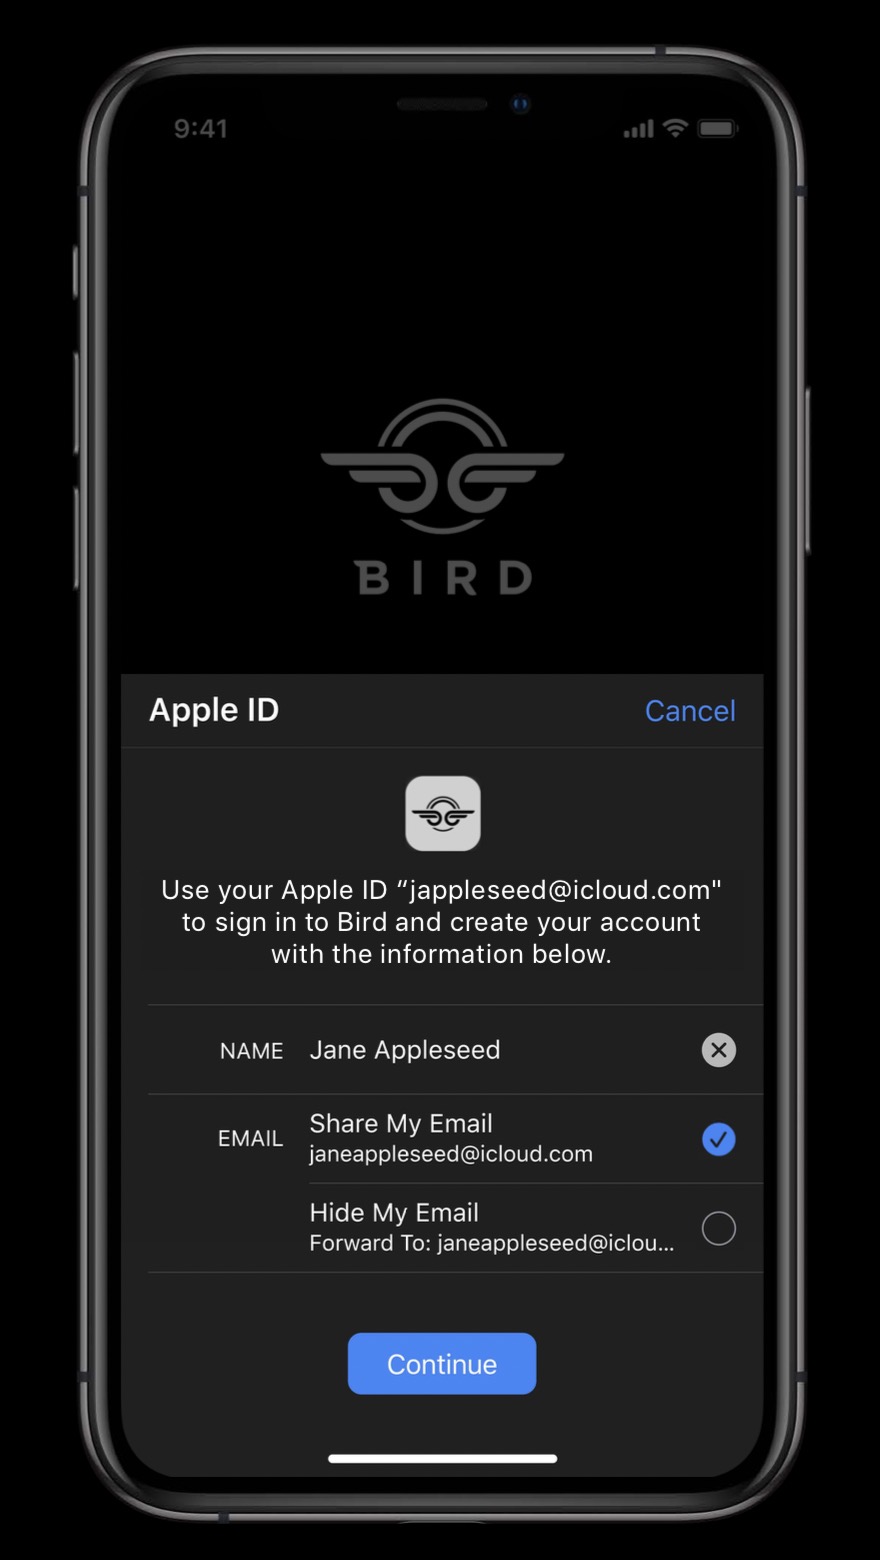
在该页面,用户可以选择是否给你返回他的名字和真实邮箱,当然用户也可以选择隐藏自己的邮箱,此时开发者会得到一个虚拟的用户邮箱地址(此邮箱收到的邮件会转发到用户真实的邮箱上)。当用户点击 “Continue” 按钮后,会进行 “Touch ID” 或者 “Face ID” 双重验证,然后回调数据给开发者。
处理回调,服务端验证结果
我们需要在代码中实现两个代理回调 ASAuthorizationControllerDelegate、ASAuthorizationControllerPresentationContextProviding 分别用于处理授权登录成功和失败、以及提供用于展示授权页面的 Window,代码如下:
1 | /// MARK: ASAuthorizationControllerDelegate |
在授权成功回调中,我们可以拿到以下几类数据:
User ID: Unique, stable, team-scoped user ID,苹果用户唯一标识符,该值在同一个开发者账号下的所有 App 下是一样的,开发者可以用该唯一标识符与自己后台系统的账号体系绑定起来(这与国内的微信、QQ、微博等第三方登录流程基本一致)。
Verification data: Identity token, code,验证数据,用于传给开发者后台服务器,然后开发者服务器再向苹果的身份验证服务端验证本次授权登录请求数据的有效性和真实性,详见 Sign In with Apple REST API。如果验证成功,可以根据 userIdentifier 判断账号是否已存在,若存在,则返回自己账号系统的登录态,若不存在,则创建一个新的账号,并返回对应的登录态给 App。
Account information: Name, verified email,苹果用户信息,包括全名、邮箱等。
Real user indicator: High confidence indicator that likely real user,用于判断当前登录的苹果账号是否是一个真实用户,取值有:
unsupported、unknown、likelyReal。
处理苹果账号会话发生变化
当开发者的 App 通过苹果账号登录后,iOS/macOS 设备上登录的 Apple ID 发生变化时,例如:
- 设备上的 Apple ID 退出登录、切换新的账号登录;
- 用户在设置页面禁止 App 使用苹果账号登录,如下图:
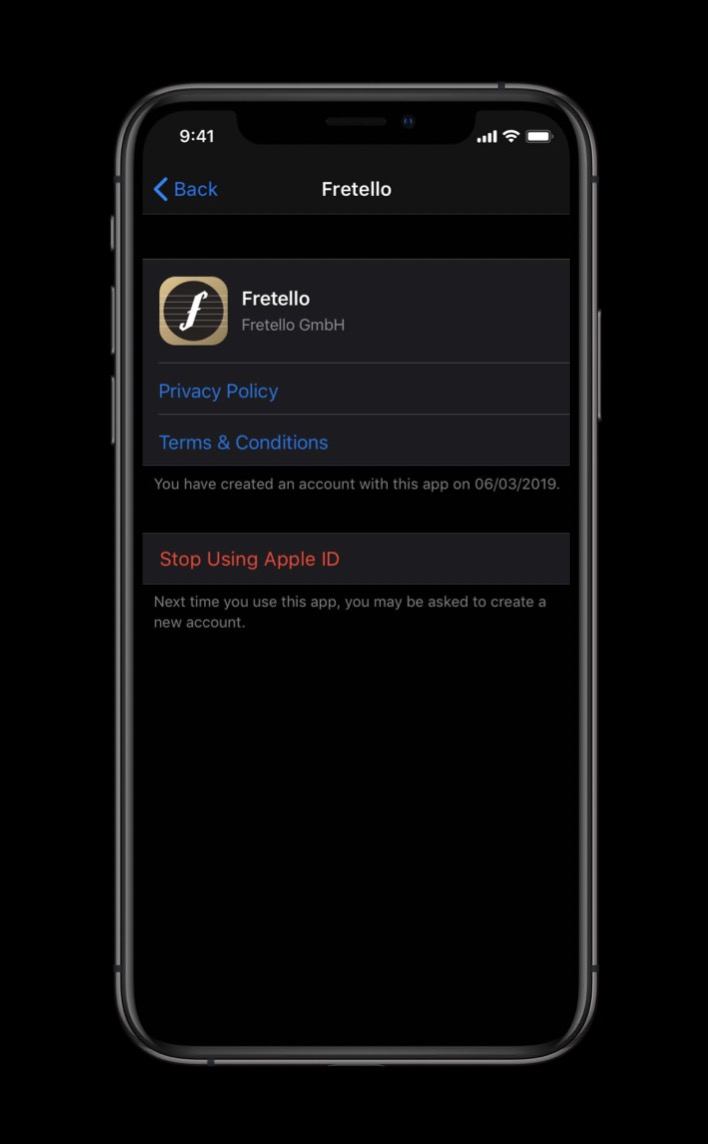
此时,也需要通知到 App 做账号登出处理。因此,我们可以 App 启动时,调用 ASAuthorizationAppleIDProvider 的 getCredentialState 方法,传入当前用户的 UserIdentifier 进行判断:
1 | let appleIDProvider = ASAuthorizationAppleIDProvider() |
苹果称,该 API 的速度非常快,我们可以在 App 每次启动时调用,然后根据结果做相应的处理:
- authorized:登录状态有效;
- revoked:上次使用苹果账号登录的凭据已被移除,需退出解除绑定并重新引导使用苹果登录;
- notFound:未登录,直接显示开发者 App 的登录页面。
此外,苹果也提供了通知的方式来监听,在 App 使用过程中,当苹果账号发生变化时做相应的处理:
1 | // Register for revocation notification |
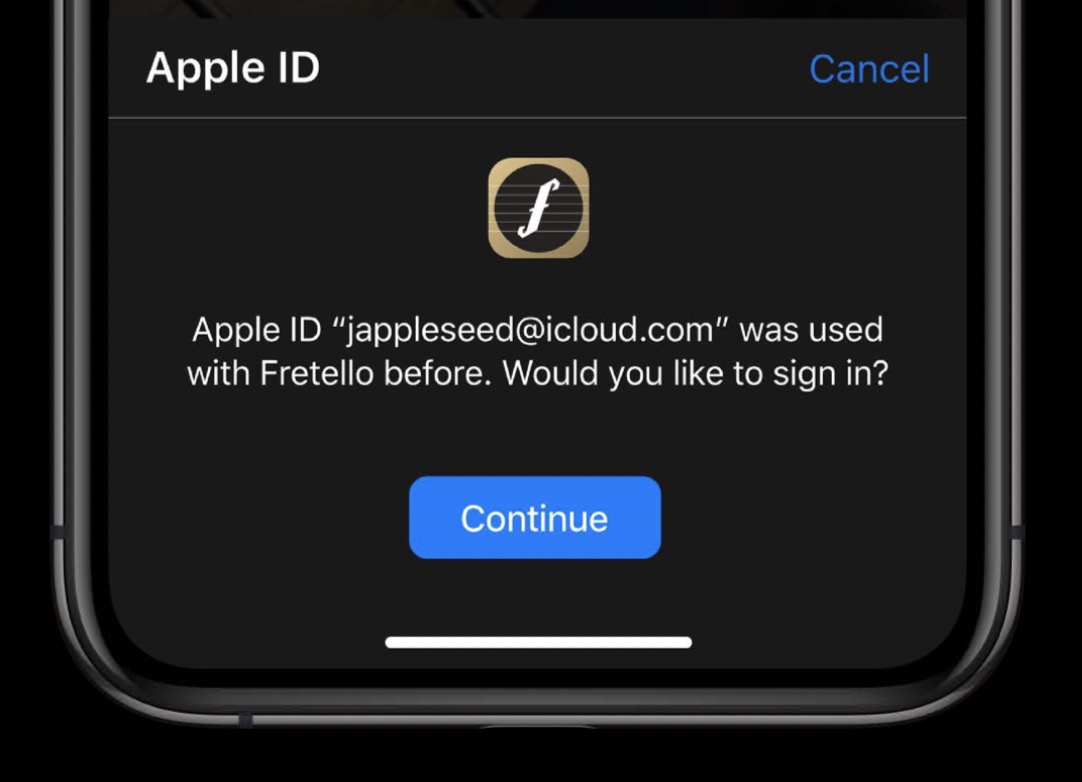
快速登录已有账户
如果一个 Apple ID 之前已在 App 中授权登录过了,此时点击 “Sign In with Apple” 会直接显示如下页面:
或者 App 上次用自己的账号/密码登录后保存在 Keychain 中,此时可以在登录页面直接请求读取密码进行自动填充:
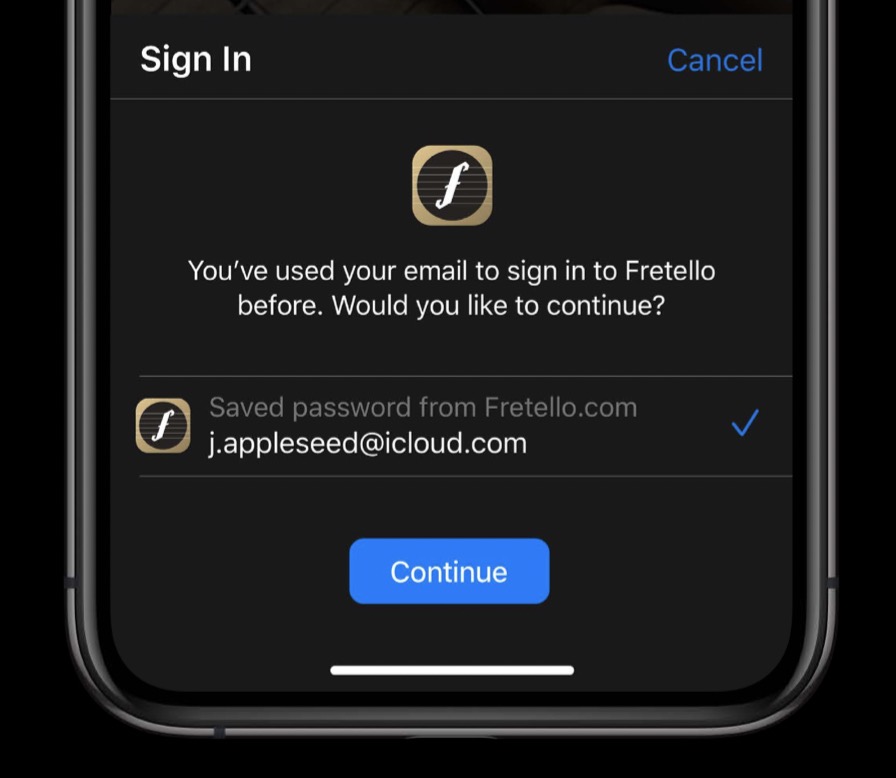
对于读取 Keychain 中保存的密码,苹果提供了与授权登录类似的 API,我们可以在登录页面的 viewDidAppear 方法中执行代码如下:
1 | /// Prompts the user if an existing iCloud Keychain credential or Apple ID credential is found. |
然后在回调方法中进行判断:
1 | func authorizationController(controller _: ASAuthorizationController, didCompleteWithAuthorization authorization: ASAuthorization) { |
补充
- App 要集成苹果账号登录,必须在 Xcode 工程的
Signing & Capabilitiestab 中添加 “Sign In with Apple” 能力,需登录相应的开发者账号; - 调试时,必须使用运行最新系统版本的真机设备,且设备上登录的 Apple ID 必须开启 2FA 双重验证;
上述示例代码完整的 Demo,详见这里:Adding the Sign In with Apple Flow to Your App
跨平台 - JavaScript SDK
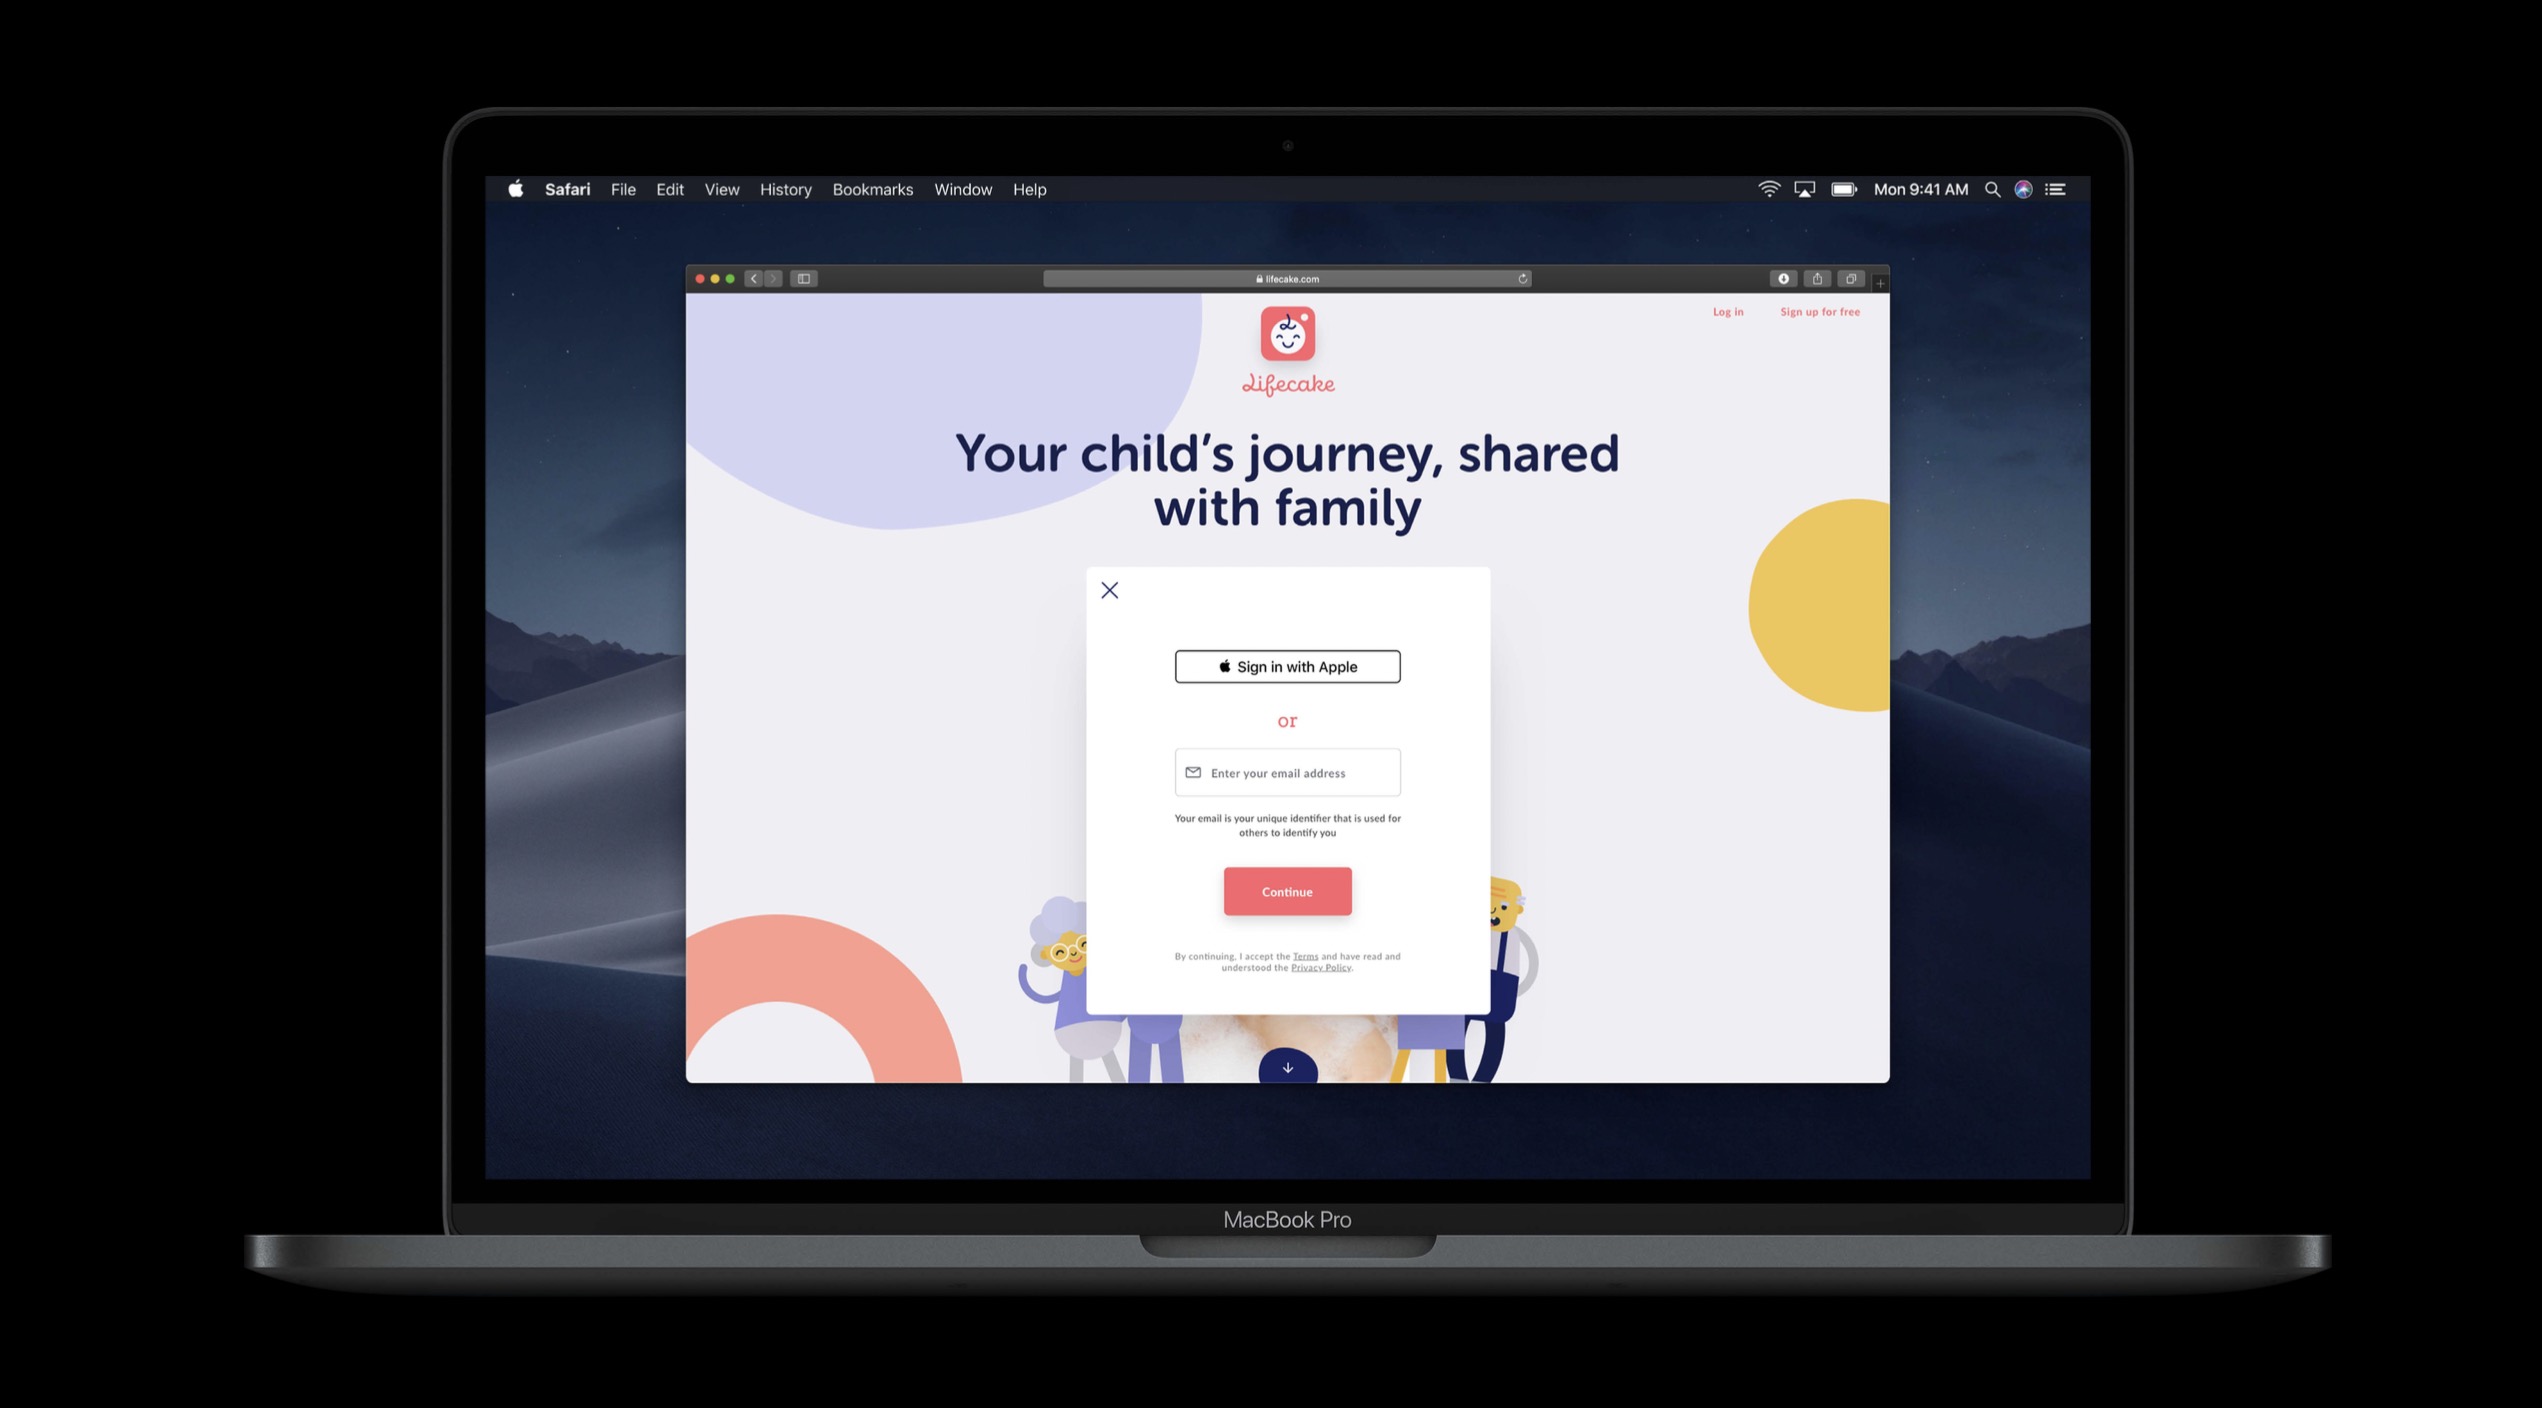
“Sign In with Apple” 最大的杀手锏在于跨平台,除了苹果自己生态内的系统,苹果还提供了 JavaScript SDK,使得在 Web 应用中也能很方便地使用该服务。因为 Web 本身是跨平台的,所以理论上在 Windows 或者 Android 操作系统上也可以使用苹果账号登录啦~
- iOS, macOS, tvOS, and watchOS: Native API
- Web / Windows / Android: Javascript SDK
它具有如下 3 个特性:
- Simple browser-based login:点击 Web 页面上的苹果登录按钮,跳转到苹果网站进行登录,然后苹果会把登录结果回调给开发者填写的 redirectUri;
- Similar to native API:JS API 与原生 API 类似,简单易用;
- Native experience when using Safari:如果用户使用 Safari 浏览器访问 Web,则会默认调用 Native API 进行授权登录操作;
JavaScript SDK 的使用步骤大致如下:
- Include:引入 SDK 依赖
1 | <script src="https://appleid.cdn-apple.com/appleauth/static/jsapi/appleid/1/en_US/appleid.auth.js"> |
- Button:添加苹果登录按钮,并自定义样式
1 | <div id="appleid-signin"></div> |
- Configure:登录信息配置,设置回调 URL
1 | AppleID.auth.init({ |
- Result:服务端处理登录回调结果
1 | POST /redirectUri |
关于苹果登录的 JS SDK 更详细的内容,请参考这里:Sign In with Apple JS
App Store 审核
在最近更新的苹果应用商店审核指南 Updates to the App Store Review Guidelines 中,有如下一段话:
Sign In with Apple will be available for beta testing this summer. It will be required as an option for users in apps that support third-party sign-in when it is commercially available later this year.
也就是说,当 “Sign In with Apple” 服务正式上线以后,所有已接入其它第三方登录的 App 也必须接入苹果账号登录,否则可能就不给过(当然,那些只有自己账号体系登录的 App 就不用担心了),苹果爸爸还真是强势,所以,适配工作赶快行动起来吧~
扩展阅读
- WWDC 2019 Session 706: Introducing Sign In with Apple
- Getting Started: Sign In with Apple
- Sample Code:Adding the Sign In with Apple Flow to Your App
- Sign In with Apple REST API
- Sign In with Apple JS